Harper College

Papercut Printing Using a Windows Device

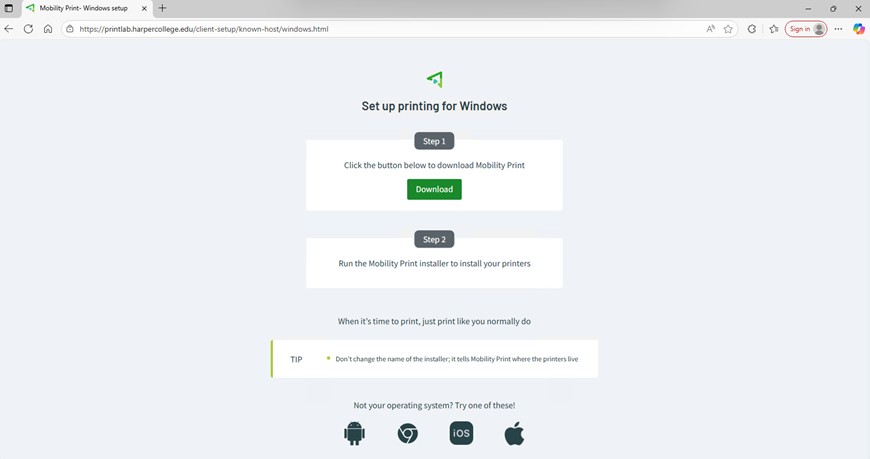
Students that wish to print on campus can utilize Papercut printers located across campus. The following guide will serve as steps to add the Papercut mobility printer on personal Windows devices.

Important: Connect your device to the Harper Public WiFi before proceeding with the steps below.

1. Visit https://printlab.harpercollege.edu/setup/. Once here click on Download.

**DO NOT change the name of the file before saving/downloading.

Screenshot of the Mobility Print setup page showing Step 1 Download button for Windows installation.


2. Open the PC Mobility Print client that was downloaded.

Screenshot showing the Mobility Print installer file downloaded in the browser’s downloads panel.


3. Click “Yes” if prompted with “Do you want to allow this app to make changes to your device?”

Windows User Account Control prompt asking to allow Mobility Print Printer Setup to make changes.


4. Click “OK” after choosing a language.

Setup window asking the user to select a language before continuing installation.


5. Click on “I accept the agreement”, then click on “Next”.

Mobility Print License Agreement screen with option to accept the agreement and click Next.


6. Select the printers you want to install and click “Next”.

Printer selection window showing options for BW Secure Print and Color Secure Print.


7. Enter your: Harper username and password

Note: Your Username is first part of your Harper email address: "username"@mail.harpercollege.edu

Login window prompting user to enter Harper username and password for printer setup.


8. Click “Finish” to complete the installation.

9. The printers will now be available as an option the next time you open the print dialog. Select the printer you want to use and click on print.

Chrome print dialog showing BWSecurePrint and ColorSecurePrint available as printer destinations.


10. Your print will now be available at any of the release stations.

Last Updated: 11/4/25